Pimcore Translate5 Connector Bundle - User Guide
This guide explains how to use the Translate5 Connector to manage translations for your Pimcore Documents and DataObjects.
🌟 Introduction
The Translate5 Connector integrates Pimcore with the Translate5 Translation Management System. It automates the export of content for professional translation and ensures that translated content is accurately imported back into your Pimcore elements.
📤 Sending Content for Translation Immediately
1. Single Element Translation
To translate a specific Page or DataObject:
- Open the element in the Pimcore Admin interface.
- Click on the translation icon in the toolbar.
- Click on "Send to translate5 (immediately)"
- Select your Source Language and Target Language(s).
- Resolve Target Page (applicable for Documents only):
- Unchecked (Default): The translation will be performed "in-place" for the current Document. Source texts will be taken from the Document itself during export. Document content will be overwriten on import. Translation is possible only to the single target language.
- Checked: The bundle will attempt to find a linked source-target (via Pimcore's page "Localization" settings). Translation is possible to multiple target languages. During the export source texts will be grabbed from the current Document's linked page resolved by the source language. During import after translation texts will be imported into the Document(s) that are resolved by target language(s).
- Click Send for Translation. The item will be sent immediately to Translate5.
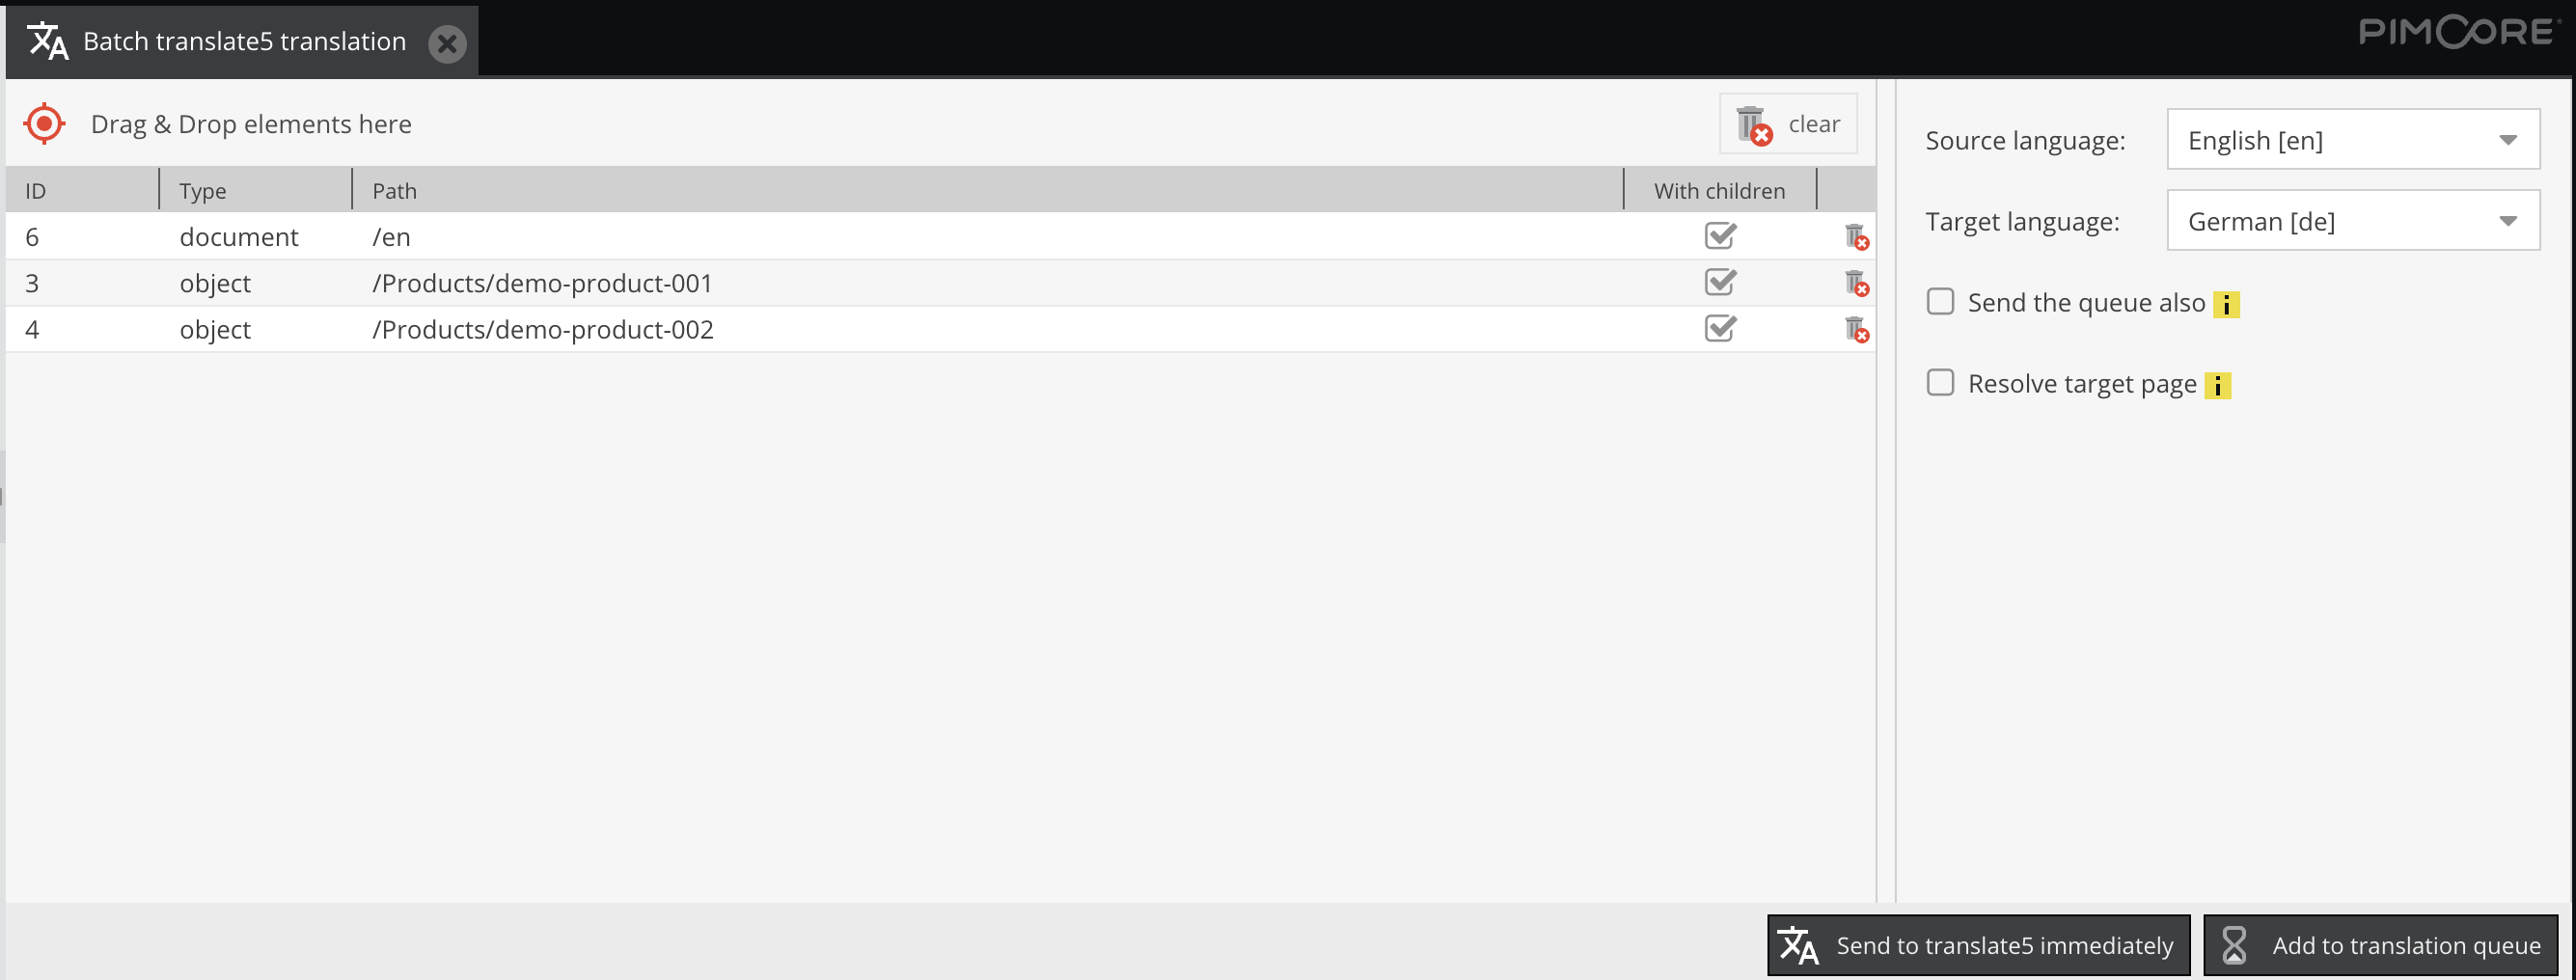
2. Batch Translation
To translate multiple items at once:
- Go to Tools → Translations → Batch transkate5 translation
- Drag'n'drop pages and/or data objects to the list
- Select your Source Language and Target Language(s).
- Resolve Target Page - behaves the same way as for single page translation and is visible only in case there are items of Document type selected.
- Click Send to translate5 immediately. The item will be sent immediately to Translate5.
Both Single Element Translation and Batch Translation UI have Send the queue also checkbox. If the checkbox is checked then alongside with the current document the queue for the same language pair is also sent. Details about the queue are in the next section.
⏳ Queuing elements for translation
Bundle provides a capability not to send Document or object for translation, but to add it to translation queue. This is useful for grouping items to save costs for translation. Admin can send to the queue one page after another and once queue is handled and sent for translation all Documents and Data objects are grouped by language pair.
1. Adding to queue single Element
To translate a specific Page or DataObject click on the translation icon in the toolbar → then click on the Queue for translate5 translation. All other steps and settings are the same as for sending to immediate translation (see above).
2. Adding to queue multiple Elements
The workflow is the same as for Batch translation (see above) except that for adding to queue you have to click Add to translation queue
Queue is sent to translate5 automatically in the background. Timing of sending (flushing) the queue is configurable in the bundle and can be:
- every certain amount of hours, e.g. every 1 hour, every 6 hours etc.
- daily at the specific time, e.g. everyday at 6 AM
- every specified day of the week at specified time, e.g. every Monday at 6 AM
Queue is only another way of grouping items to be sent for translation, no other differences against sending immediately.