...
translate5 domain: the used translate5 instance url (exgoogle configuration example: httpshttp://translate5-openid.net/com). This is also the url which the user will be redirected to after the OpenId authentication.
OpenId server: OpenId authentication server url (exgoogle configuration example: https://accounts.google.com)
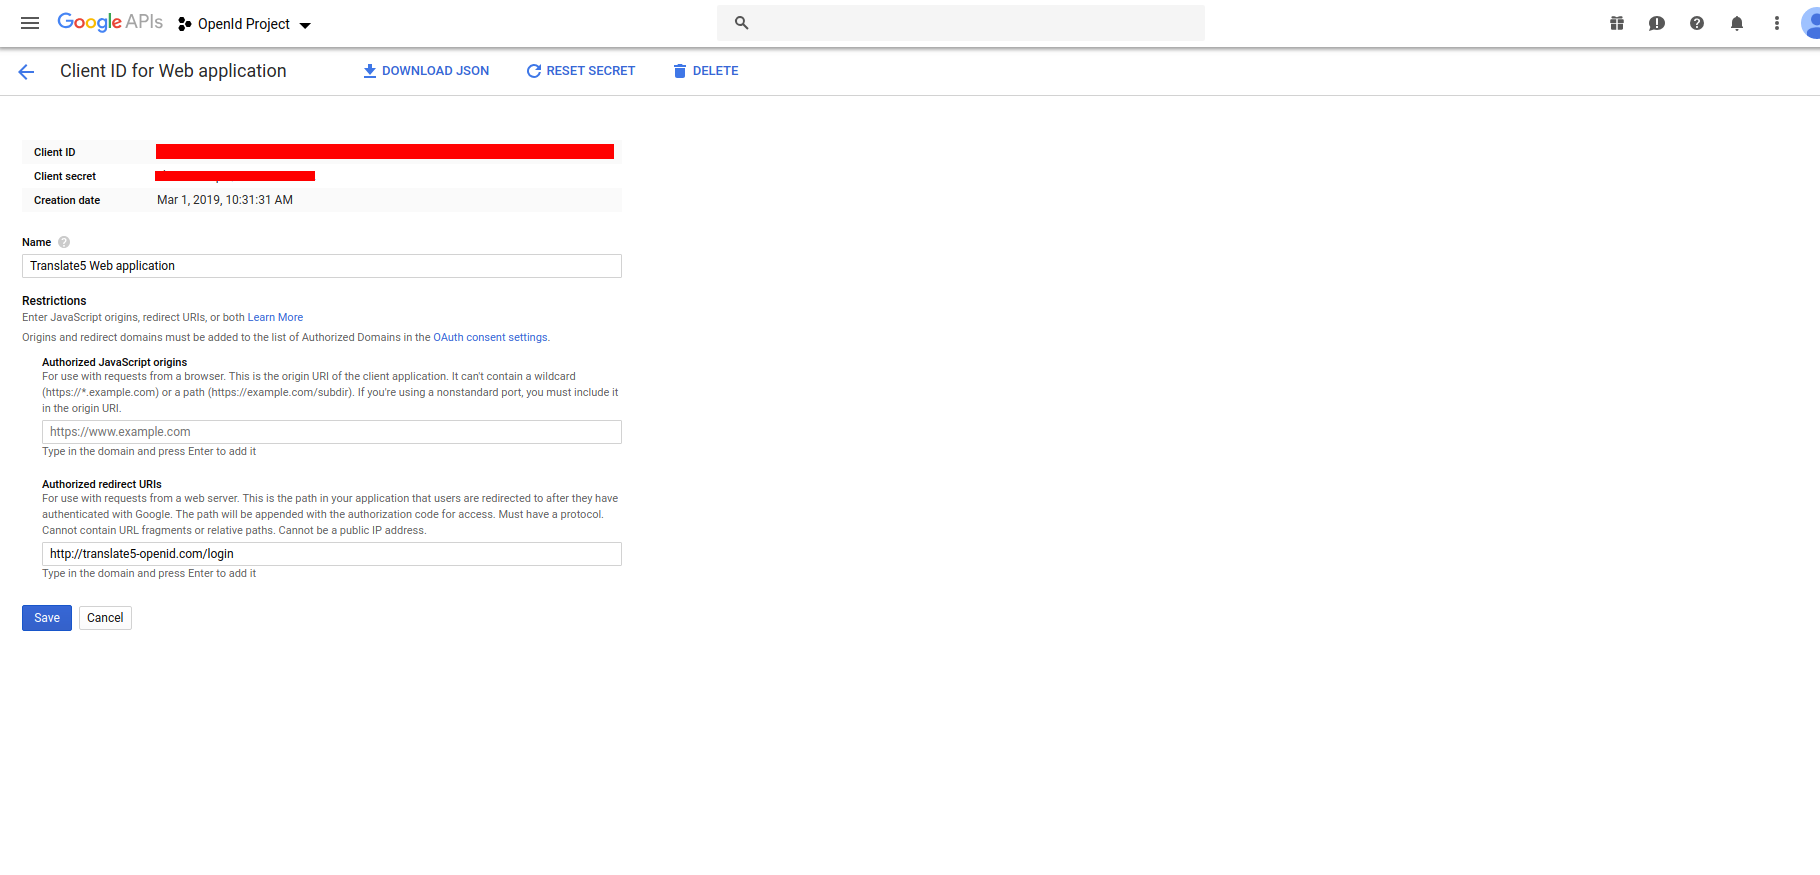
OpenId user name: OpenId authentication server username (google configuration example: "Client ID" see image3)
(the user name that allows the openId client application to connect to the API of the openId server; do NOT mix this up with the username of the user, that wants to authenticate!)
OpenId password: OpenId authentication server passwordpassword (google configuration example: "Client secret" see image3)
(the password that allows the openId client application to connect to the API of the openId server; do NOT mix this up with the password of the user, that wants to authenticate!)
OpenId OAuth URL: OpenId authentication server OAuth url (exgoogle configuration example:: https://accounts.google.com/o/oauth2/auth). Also used to fetch the openid server properties (ex: https://accounts.google.com/o/oauth2/auth/.well-known/openid-configuration)
...
Link text on login page: Label text on the login page of translate5. A click on it redirects the user to the configured openid server for authentication, instead of using translate5 for authentication. If the checbox below the field "Link text on login page" is checked, the user will directly be redirected to the openid server for authentication/authorization and will never see the translate5 login page.
Example with Google's OAuth 2.0 API
Before your application can use Google's OAuth 2.0 authentication system for user login, you must set up a project in the Google API Console to obtain OAuth 2.0 credentials, set a redirect URI, and (optionally) customize the branding information that your users see on the user-consent screen.
Obtain OAuth 2.0 credentials
You need OAuth 2.0 credentials, including a client ID and client secret, to authenticate users and gain access to Google's APIs.
To find your project's client ID and client secret, do the following:
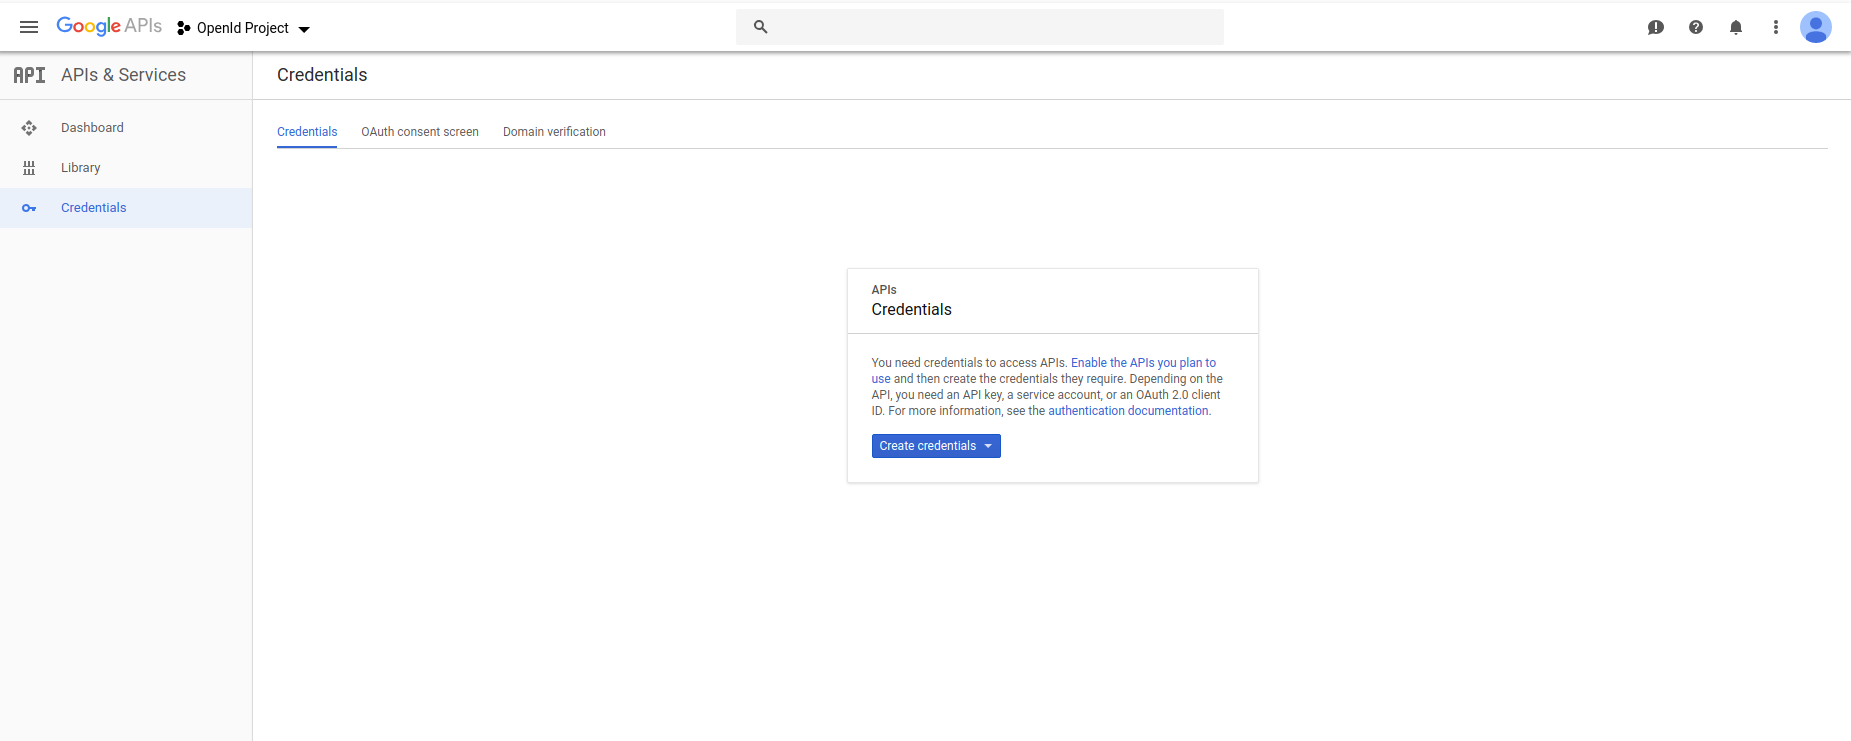
- Select an existing OAuth 2.0 credential or open the Credentials page. (see image1)
- If you haven't done so already, create your project's OAuth 2.0 credentials by clicking Create credentials > OAuth client ID, and providing the information needed to create the credentials.
- click on Create credentials dropdown and select OAuth client ID
- on the next window Configure consent screen
- select Web application in the radio button options
- give a name to your your OAuth client ID (this is not the display name of your app) and click create
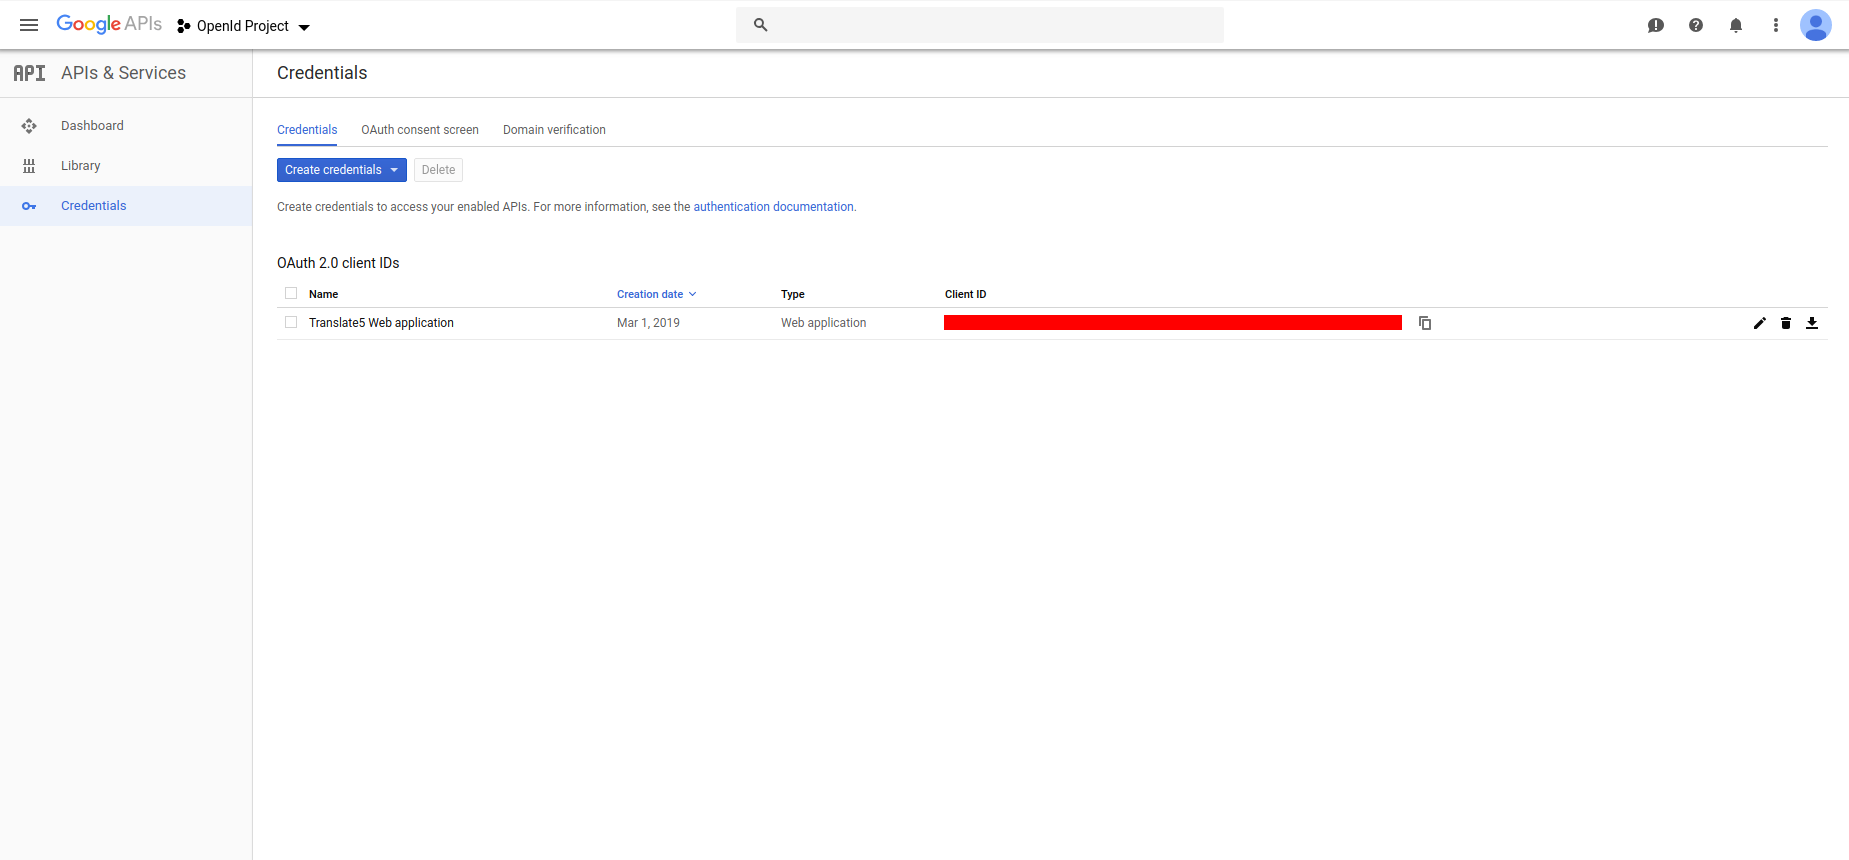
- now the new created client id should be listed in the credentials tab (see image2)
- the next step is to set up Authorized domain
- navigate to the OAuth consent screen
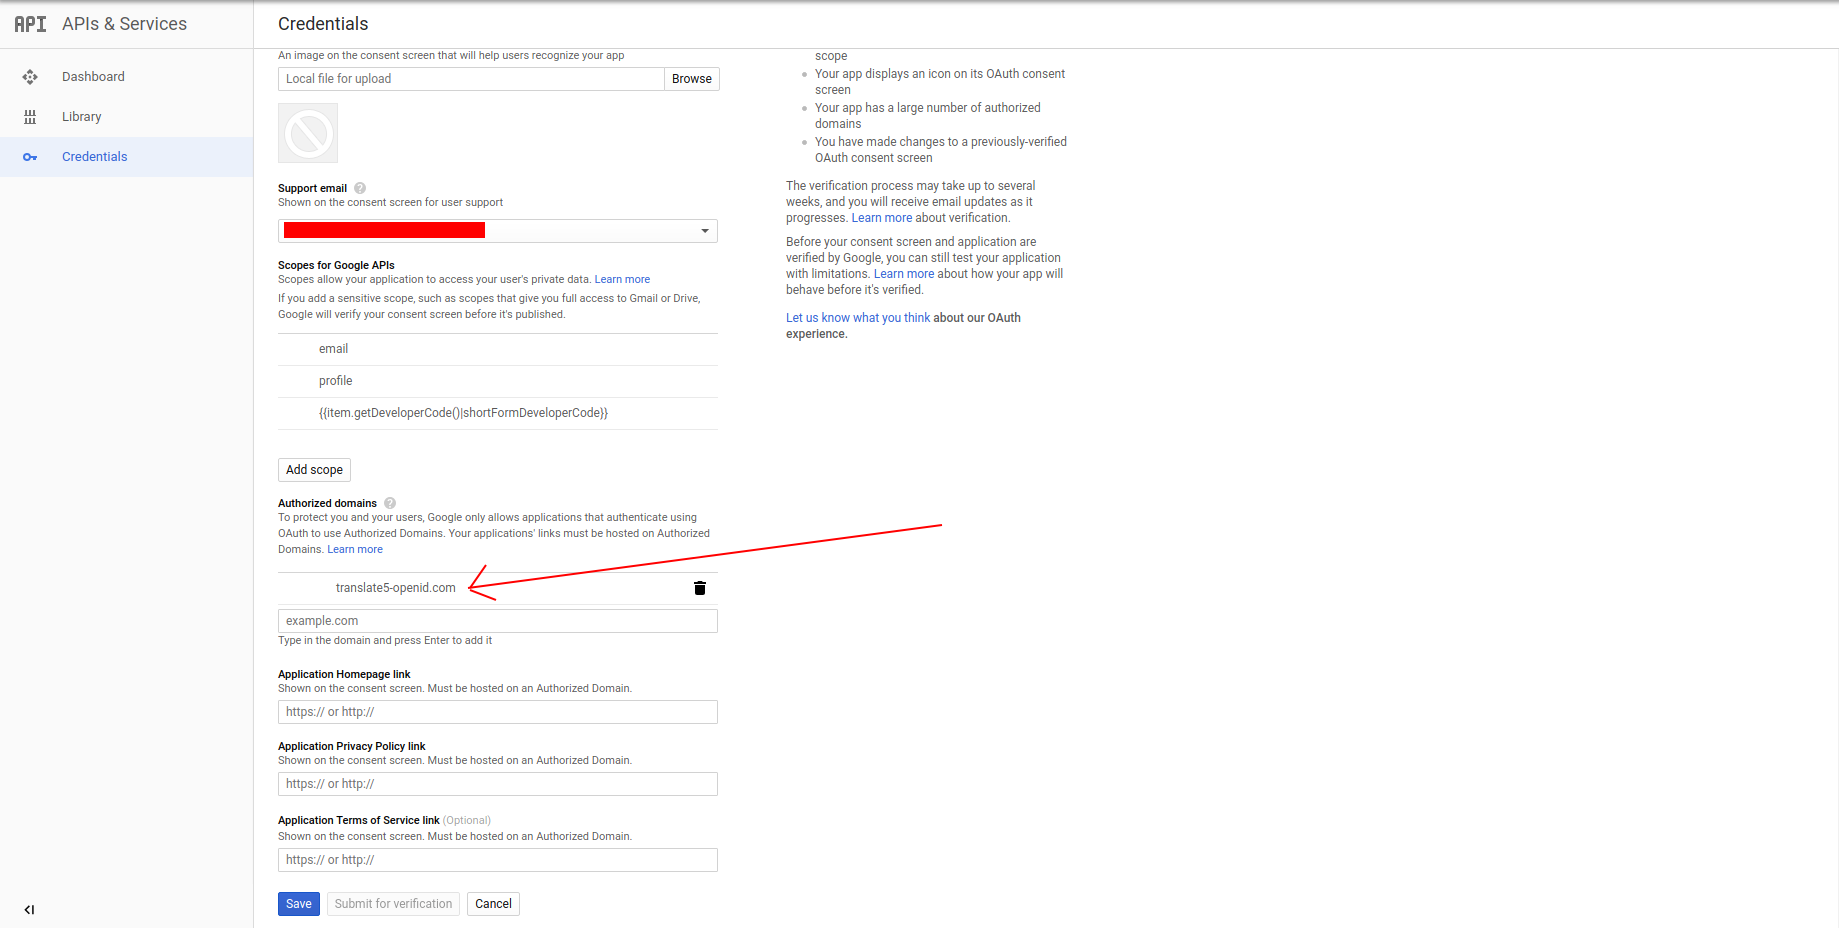
- in the Authorized domains field add you current translate5 domain without protocol (see image4)
- click on save in the page bellow
- the next step is to add redirect Urls
- click on the credentials tab, and click on the openid client
- in the field Authorized redirect URIs add your translate5 instacne domain folowed by /login (image3) and click on save
- Look for the Client ID in the OAuth 2.0 client IDs section. For details, click the client ID.