The Quality management and Auto QA mainly consists of 4 panels in the front-end for editing a task:
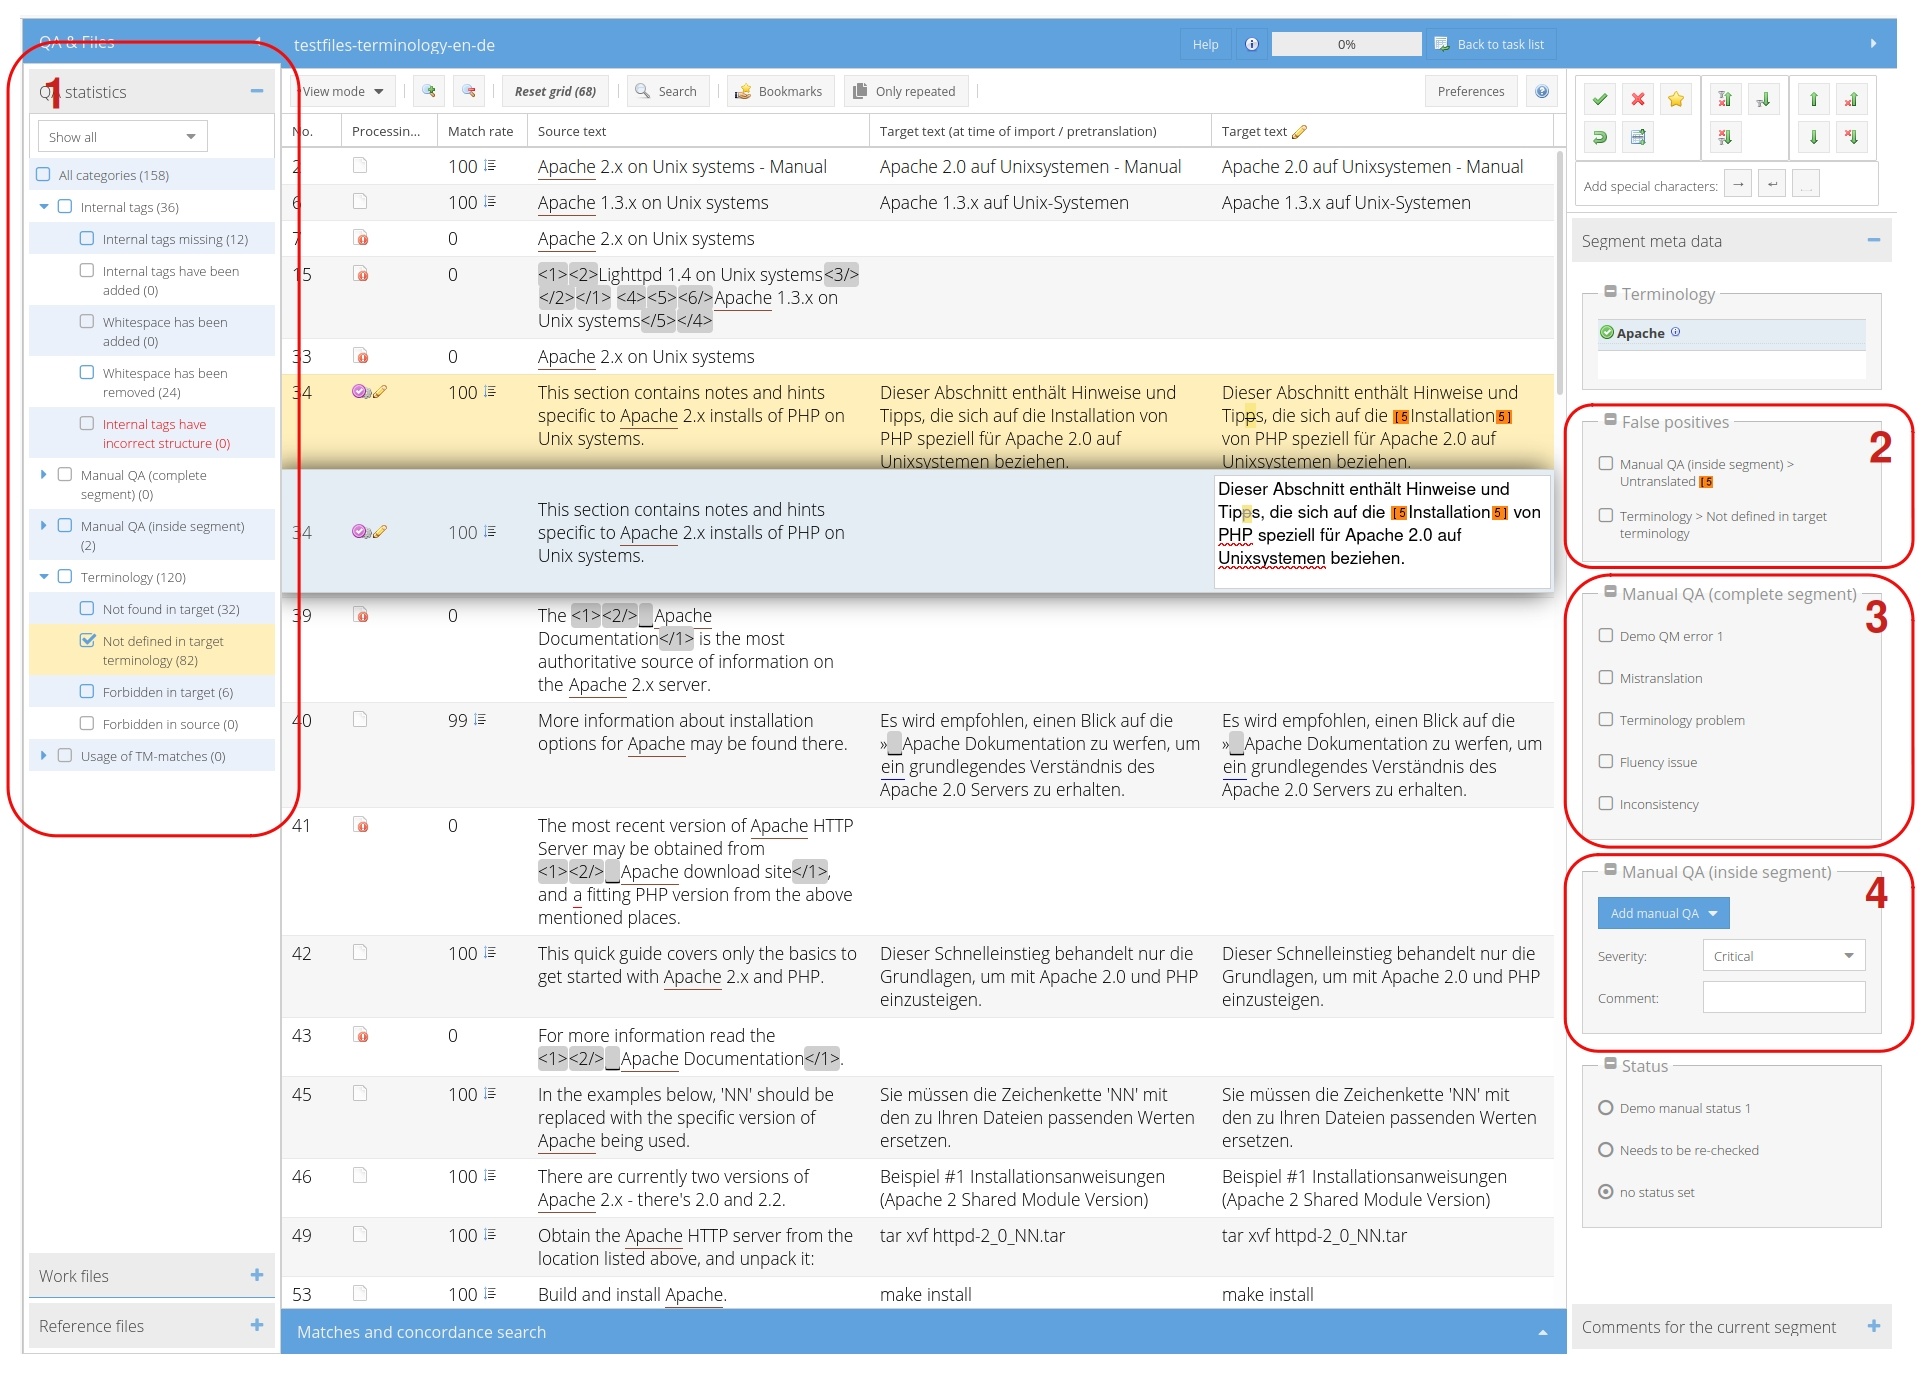
1) Filter Panel
Here you see all quality issues that have been evaluated or have been manually assigned for the segments of the current task.
You can filter the shown segments in the grid by checking the categories in the filter panel. If you check a rubric (top level category), all children of the rubric will be selected at once.
The same applies for deselecting a rubric. There also is a root node of the tree called "All categories" that will select / deselect all categories below. Note, that categories that have no segments can not be selected.
To further filter the shown segments you can use the filter above the grid and the filter panel in conjunction. To reset the filtering of the grid you can use the "Reset grid" button above the grid.
Above the grid you have an additional filter to restrict the shown qualities: All (default), "real" issues and "false positive" issues.
Note, that a quality that blocks exporting a task (structural tag errors) are highlighted in red.
2) "False Positives" Panel
When editing a segment this panel appears and shows all qualities, that have been assigned for the edited segment. Each quality can be set to "false positive" meaning, that the issue was wrongly recognized.
Please note, that setting qualities to "false positive" is immediate, any changes will persist even if the segment editing is canceled.
3) Manual QA (complete segment)
Here issues for the whole segment can be set. Any changes are applied immediately and persist even when canceling the segment editing.
Note that the categories shown in the panel can be set for each task individually via the QM_Subsegment_Issues.xml file in the import zip.
4) Manual QA (inside segments)
Here issues for sections/words of the edited segment can be set. To do so, you have to mark a word or a section of the edited segment first.
Afterwards you can optionally select a severity and add a comment, then select a quality metrics by clicking on the drop-down "Add manual QA".
This opens a multi-dimensional menu of the configurable metrics, sub-menus can be opened by hovering over the menu-entry with the mouse.
When you click on a menu-entry, this will assign the clicked metrics to the section/word selected in the HTML editor.
To open sub-menus, do not click on them, as this actually selects the category, if no text/section is selected, no metrics will be applied.
Note that the changes made with this panel are not immediate and need to be persisted by using the save button.
See here for more information about MQM
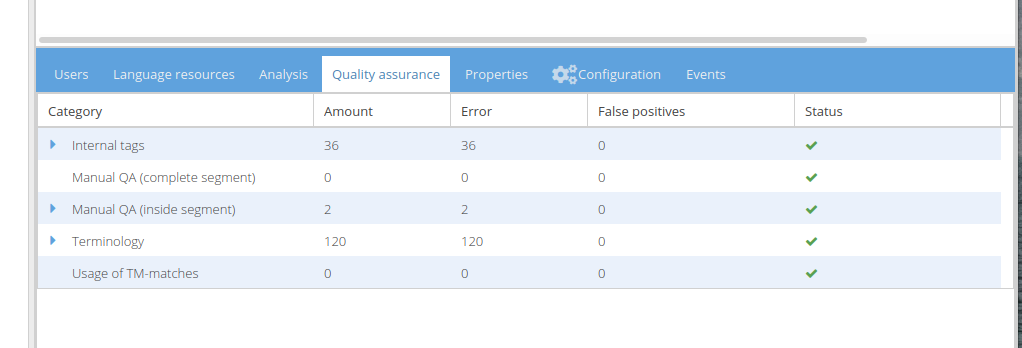
5) Task Panel
In the Task-Overview, there is a QA Panel giving a short overview of the applied issues for the selected task. Note that errors blocking the export of the task will be highlighted in red and have a red cross in the status column.
The green check-mark means, that the category has been completely evaluated for the task, categories, that have been configured to not be evaluated will have a yellow exclamation mark.
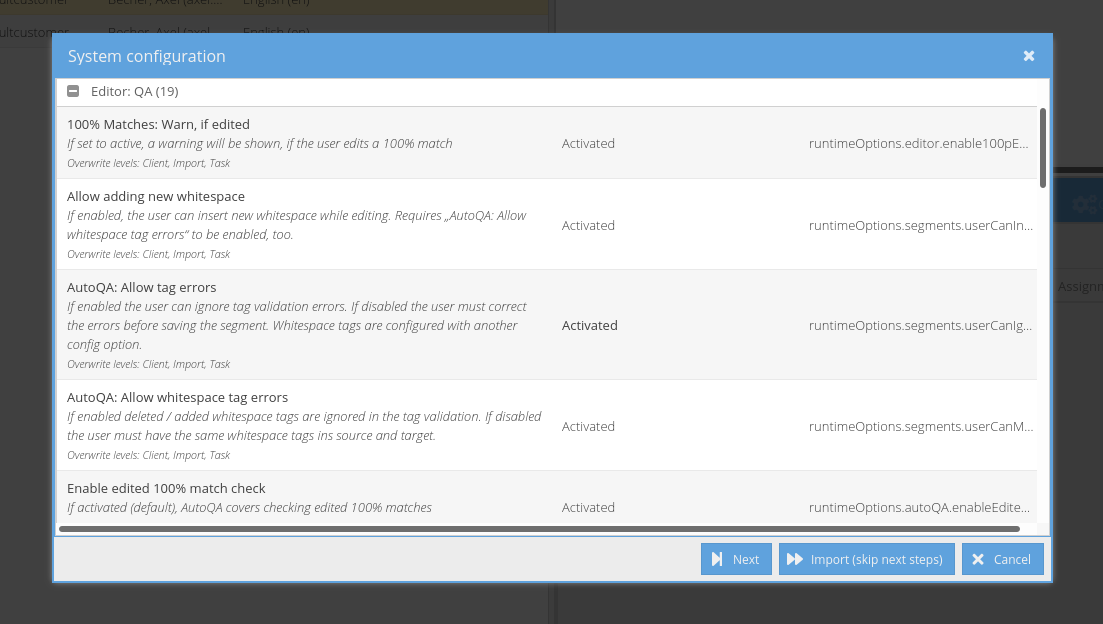
6.) Configuration Options on Task-Import
The "Editor: QA" section of the task configuration let you set up the Auto QA when importing a task. issues, that should not be evaluated, can be deselected before import.
Please note, that this can only be set up before importing a task and these configurations are locked for the rest of the task's lifetime.